$ yarn global add knex-migrator ember-cli
yarn global v1.22.18
[1/4] Resolving packages...
warning knex-migrator > ghost-ignition > bunyan-loggly > node-loggly-bulk > request@2.88.2: request has been deprecated, see https://github.com/request/request/issues/3142
warning knex-migrator > ghost-ignition > bunyan-loggly > node-loggly-bulk > request > uuid@3.4.0: Please upgrade  to version 7 or higher.  Older versions may use Math.random() in certain circumstances, which is known to be problematic.  See https://v8.dev/blog/math-random for details.
warning knex-migrator > ghost-ignition > bunyan-loggly > node-loggly-bulk > request > har-validator@5.1.5: this library is no longer supported
warning ember-cli > broccoli > sane@4.1.0: some dependency vulnerabilities fixed, support for node < 10 dropped, and newer ECMAScript syntax/features added
warning ember-cli > broccoli-babel-transpiler > @babel/polyfill@7.12.1: 🚨 This package has been deprecated in favor of separate inclusion of a polyfill and regenerator-runtime (when needed). See the @babel/polyfill docs (https://babeljs.io/docs/en/babel-polyfill) for more information.
warning ember-cli > broccoli-babel-transpiler > @babel/polyfill > core-js@2.6.12: core-js@<3.4 is no longer maintained and not recommended for usage due to the number of issues. Because of the V8 engine whims, feature detection in old core-js versions could cause a slowdown up to 100x even if nothing is polyfilled. Please, upgrade your dependencies to the actual version of core-js.
warning ember-cli > broccoli-concat > fast-sourcemap-concat > source-map-url@0.3.0: See https://github.com/lydell/source-map-url#deprecated
warning ember-cli > broccoli > sane > micromatch > snapdragon > source-map-resolve@0.5.3: See https://github.com/lydell/source-map-resolve#deprecated
warning ember-cli > broccoli > sane > micromatch > snapdragon > source-map-resolve > source-map-url@0.4.1: See https://github.com/lydell/source-map-url#deprecated
warning ember-cli > broccoli > sane > micromatch > snapdragon > source-map-resolve > resolve-url@0.2.1: https://github.com/lydell/resolve-url#deprecated
warning ember-cli > broccoli > sane > micromatch > snapdragon > source-map-resolve > urix@0.1.0: Please see https://github.com/lydell/urix#deprecated
[2/4] Fetching packages...
error knex@2.0.0: The engine "node" is incompatible with this module. Expected version ">=12". Got "10.19.0"
error Found incompatible module.
info Visit https://yarnpkg.com/en/docs/cli/global for documentation about this command.
node 버전 문제로 인해 error가 발생합니다.
12 이상의 node버전이 필요하므로 node update를 먼저 실행하고 진행합니다. (위에서 언급한 node설치 포스팅을 참고하세요.)
global package를 다시 설치해보니 이번엔 잘 됩니다.
$ yarn global add knex-migrator ember-cli
yarn global v1.22.18
[1/4] Resolving packages...
warning knex-migrator > ghost-ignition > bunyan-loggly > node-loggly-bulk > request@2.88.2: request has been deprecated, see https://github.com/request/request/issues/3142
warning knex-migrator > ghost-ignition > bunyan-loggly > node-loggly-bulk > request > uuid@3.4.0: Please upgrade  to version 7 or higher.  Older versions may use Math.random() in certain circumstances, which is known to be problematic.  See https://v8.dev/blog/math-random for details.
warning knex-migrator > ghost-ignition > bunyan-loggly > node-loggly-bulk > request > har-validator@5.1.5: this library is no longer supported
warning ember-cli > broccoli > sane@4.1.0: some dependency vulnerabilities fixed, support for node < 10 dropped, and newer ECMAScript syntax/features added
warning ember-cli > broccoli-babel-transpiler > @babel/polyfill@7.12.1: 🚨 This package has been deprecated in favor of separate inclusion of a polyfill and regenerator-runtime (when needed). See the @babel/polyfill docs (https://babeljs.io/docs/en/babel-polyfill) for more information.
warning ember-cli > broccoli-babel-transpiler > @babel/polyfill > core-js@2.6.12: core-js@<3.4 is no longer maintained and not recommended for usage due to the number of issues. Because of the V8 engine whims, feature detection in old core-js versions could cause a slowdown up to 100x even if nothing is polyfilled. Please, upgrade your dependencies to the actual version of core-js.
warning ember-cli > broccoli-concat > fast-sourcemap-concat > source-map-url@0.3.0: See https://github.com/lydell/source-map-url#deprecated
warning ember-cli > broccoli > sane > micromatch > snapdragon > source-map-resolve@0.5.3: See https://github.com/lydell/source-map-resolve#deprecated
warning ember-cli > broccoli > sane > micromatch > snapdragon > source-map-resolve > source-map-url@0.4.1: See https://github.com/lydell/source-map-url#deprecated
warning ember-cli > broccoli > sane > micromatch > snapdragon > source-map-resolve > resolve-url@0.2.1: https://github.com/lydell/resolve-url#deprecated
warning ember-cli > broccoli > sane > micromatch > snapdragon > source-map-resolve > urix@0.1.0: Please see https://github.com/lydell/urix#deprecated
[2/4] Fetching packages...
[3/4] Linking dependencies...
[4/4] Building fresh packages...
success Installed "knex-migrator@4.2.10" with binaries:
      - knex-migrator
      - knex-migrator-init
      - knex-migrator-health
      - knex-migrator-migrate
      - knex-migrator-reset
      - knex-migrator-rollback
success Installed "ember-cli@4.3.0" with binaries:
      - ember
Done in 37.60s.
~/Ghost$ yarn start
yarn run v1.22.18
warning ghost@4.46.0: The engine "cli" appears to be invalid.
$ node index
[2022-05-18 05:50:53] INFO Ghost is running in development...
[2022-05-18 05:50:53] INFO Listening on: 127.0.0.1:2368
[2022-05-18 05:50:53] INFO Url configured as: http://localhost:2368/
[2022-05-18 05:50:53] INFO Ctrl+C to shut down
[2022-05-18 05:50:53] INFO Ghost server started in 2.136s
[2022-05-18 05:50:54] INFO Database is in a ready state.
[2022-05-18 05:50:54] INFO Ghost database ready in 2.726s
[2022-05-18 05:50:59] INFO Stripe not configured - skipping migrations
[2022-05-18 05:50:59] INFO Ghost URL Service Ready in 8.238s
[2022-05-18 05:50:59] INFO Ghost booted in 8.417s
[2022-05-18 05:50:59] INFO Adding offloaded job to the queue
[2022-05-18 05:50:59] INFO Scheduling job update-check at 2 53 15 * * *. Next run on: Wed May 18 2022 15:53:02 GMT+0000 (Coordinated Universal Time)
node는 서버 프로그래밍을 위한 js 런타임으로 javaScript로 확장 가능한 백엔드 기능을 개발할 수 있습니다.
1. CURL 설치
node를 설치하기 전 커맨드 라인 툴을 설치해야 합니다.
CURL은 서버와 통신할 수 있는 커맨드 명령어 오픈소스 툴로 아래의 명령어로 설치합니다.
$ sudo apt-get install -y curl
Reading package lists... Done
Building dependency tree
Reading state information... Done
curl is already the newest version (7.68.0-1ubuntu2.7).
curl set to manually installed.
0 upgraded, 0 newly installed, 0 to remove and 0 not upgraded.
2. apt 패키지 매니저 이용하여 설치
apt 패키지 매니저를 update 합니다.
$ sudo apt update
Hit:1 http://ap-northeast-2.ec2.archive.ubuntu.com/ubuntu focal InRelease
.....
Get:42 http://security.ubuntu.com/ubuntu focal-security/multiverse amd64 c-n-f Metadata [512 B]
Fetched 22.8 MB in 4s (5470 kB/s)
Reading package lists... Done
Building dependency tree
Reading state information... Done
48 packages can be upgraded. Run 'apt list --upgradable' to see them.
nodejs를 설치합니다.
$ sudo apt install nodejs
Reading package lists... Done
Building dependency tree
Reading state information... Done
nodejs is already the newest version (10.19.0~dfsg-3ubuntu1).
0 upgraded, 0 newly installed, 0 to remove and 48 not upgraded.
버전 확인을 통해 설치 확인을 합니다.
$ nodejs -v
v10.19.0
노드 패키지 매니저인 npm을 다운로드합니다.
$  sudo apt install npm
Reading package lists... Done
Building dependency tree
Reading state information... Done
The following additional packages will be installed:
...
$ sudo bash nodesource_14_setup.sh
## Installing the NodeSource Node.js 14.x repo...
## Populating apt-get cache...
+ apt-get update
Hit:1 http://ap-northeast-2.ec2.archive.ubuntu.com/ubuntu focal InRelease
Hit:2 http://ap-northeast-2.ec2.archive.ubuntu.com/ubuntu focal-updates InRelease
Hit:3 http://ap-northeast-2.ec2.archive.ubuntu.com/ubuntu focal-backports InRelease
Get:4 http://security.ubuntu.com/ubuntu focal-security InRelease [114 kB]
Fetched 114 kB in 2s (69.3 kB/s)
Reading package lists... Done
## Confirming "focal" is supported...
+ curl -sLf -o /dev/null 'https://deb.nodesource.com/node_14.x/dists/focal/Release'
## Adding the NodeSource signing key to your keyring...
+ curl -s https://deb.nodesource.com/gpgkey/nodesource.gpg.key | gpg --dearmor | tee /usr/share/keyrings/nodesource.gpg >/dev/null
## Creating apt sources list file for the NodeSource Node.js 14.x repo...
+ echo 'deb [signed-by=/usr/share/keyrings/nodesource.gpg] https://deb.nodesource.com/node_14.x focal main' > /etc/apt/sources.list.d/nodesource.list
+ echo 'deb-src [signed-by=/usr/share/keyrings/nodesource.gpg] https://deb.nodesource.com/node_14.x focal main' >> /etc/apt/sources.list.d/nodesource.list
## Running `apt-get update` for you...
+ apt-get update
Hit:1 http://ap-northeast-2.ec2.archive.ubuntu.com/ubuntu focal InRelease
Hit:2 http://ap-northeast-2.ec2.archive.ubuntu.com/ubuntu focal-updates InRelease
Hit:3 http://ap-northeast-2.ec2.archive.ubuntu.com/ubuntu focal-backports InRelease
Get:4 https://deb.nodesource.com/node_14.x focal InRelease [4583 B]
Get:5 https://deb.nodesource.com/node_14.x focal/main amd64 Packages [774 B]
Hit:6 http://security.ubuntu.com/ubuntu focal-security InRelease
Fetched 5357 B in 0s (11.9 kB/s)
Reading package lists... Done
## Run `sudo apt-get install -y nodejs` to install Node.js 14.x and npm
## You may also need development tools to build native addons:
     sudo apt-get install gcc g++ make
## To install the Yarn package manager, run:
     curl -sL https://dl.yarnpkg.com/debian/pubkey.gpg | gpg --dearmor | sudo tee /usr/share/keyrings/yarnkey.gpg >/dev/null
     echo "deb [signed-by=/usr/share/keyrings/yarnkey.gpg] https://dl.yarnpkg.com/debian stable main" | sudo tee /etc/apt/sources.list.d/yarn.list
     sudo apt-get update && sudo apt-get install yarn
다운로드한 버전으로 node를 설치합니다.
$ sudo apt install nodejs
Reading package lists... Done
Building dependency tree
Reading state information... Done
The following packages were automatically installed and are no longer required:
  fontconfig-config fonts-dejavu-core gyp javascript-common libauthen-sasl-perl libc-ares2 libdata-dump-perl
  libdrm-amdgpu1 libdrm-intel1 libdrm-nouveau2 libdrm-radeon1 libencode-locale-perl libfile-basedir-perl
  libfile-desktopentry-perl libfile-listing-perl libfile-mimeinfo-perl libfont-afm-perl libfontconfig1 libfontenc1
  libgl1 libgl1-mesa-dri libglapi-mesa libglvnd0 libglx-mesa0 libglx0 libhtml-form-perl libhtml-format-perl
  libhtml-parser-perl libhtml-tagset-perl libhtml-tree-perl libhttp-cookies-perl libhttp-daemon-perl libhttp-date-perl
  libhttp-message-perl libhttp-negotiate-perl libice6 libio-html-perl libio-socket-ssl-perl libio-stringy-perl
...
Use 'sudo apt autoremove' to remove them.
The following packages will be REMOVED:
  libnode-dev libnode64 node-gyp nodejs-doc npm
The following packages will be upgraded:
  nodejs
1 upgraded, 0 newly installed, 5 to remove and 46 not upgraded.
Need to get 25.4 MB of archives.
After this operatio , 87.7 MB of additional disk space will be used.
Do you want to continue? [Y/n] y
Get:1 https://deb.nodesource.com/node_14.x focal/main amd64 nodejs amd64 14.19.3-deb-1nodesource1 [25.4 MB]
Fetched 25.4 MB in 0s (61.0 MB/s)
(Reading database ... 75731 files and directories currently installed.)
Removing npm (6.14.4+ds-1ubuntu2) ...
Removing node-gyp (6.1.0-3) ...
Removing libnode-dev:amd64 (10.19.0~dfsg-3ubuntu1) ...
Removing nodejs-doc (10.19.0~dfsg-3ubuntu1) ...
dpkg: libnode64:amd64: dependency problems, but removing anyway as you requested:
 nodejs depends on libnode64 (= 10.19.0~dfsg-3ubuntu1).
...
Removing libnode64:amd64 (10.19.0~dfsg-3ubuntu1) ...
(Reading database ... 74289 files and directories currently installed.)
Preparing to unpack .../nodejs_14.19.3-deb-1nodesource1_amd64.deb ...
Unpacking nodejs (14.19.3-deb-1nodesource1) over (10.19.0~dfsg-3ubuntu1) ...
Setting up nodejs (14.19.3-deb-1nodesource1) ...
Processing triggers for libc-bin (2.31-0ubuntu9.7) ...
Processing triggers for man-db (2.9.1-1) ...
$ sudo mysql
Welcome to the MySQL monitor.  Commands end with ; or \g.
Your MySQL connection id is 8
Server version: 8.0.29-0ubuntu0.22.04.2 (Ubuntu)

Copyright (c) 2000, 2022, Oracle and/or its affiliates.

Oracle is a registered trademark of Oracle Corporation and/or its
affiliates. Other names may be trademarks of their respective
owners.

Type 'help;' or '\h' for help. Type '\c' to clear the current input statement.
mysql> ALTER USER 'root'@'localhost' IDENTIFIED WITH mysql_native_password BY '비밀번호';
Query OK, 0 rows affected (0.01 sec)
Ghost-CLI는 Ghost를 빠르고 쉽게 사용하기 위한 commandline 툴입니다. npm 또는 yarn을 이용하여 설치할 수 있습니다.
$ sudo npm install ghost-cli@latest -g
5. Ghost 설치
생성할 sitename으로 디렉터리를 생성합니다.
sudo mkdir -p /var/www/'sitename'
ghost-admin 사용자를 추가합니다.
$ sudo adduser ghost-admin
Adding user `ghost-admin' ...
Adding new group `ghost-admin' (1001) ...
Adding new user `ghost-admin' (1001) with group `ghost-admin' ...
Creating home directory `/home/ghost-admin' ...
Copying files from `/etc/skel' ...
New password:
Retype new password:
passwd: password updated successfully
Changing the user information for ghost-admin
Enter the new value, or press ENTER for the default
        Full Name []:
        Room Number []:
        Work Phone []:
        Home Phone []:
        Other []:
Is the information correct? [Y/n]
추가한 사용자에 superuser gorup을 부여합니다.
$ sudo usermod -aG sudo ghost-admin
위에서 생성한 폴더에 소유자를 변경합니다.
$ sudo chown ghost-admin:ghost-admin /var/www/'sitename'
[sudo] password for ghost-admin:
ll 명령어로 소유자가 변경됐음을 확인합니다.
$ ll
total 16
drwxr-xr-x  4 root        root        4096 May 16 06:17 ./
drwxr-xr-x 14 root        root        4096 May 16 05:54 ../
drwxr-xr-x  2 ghost-admin ghost-admin 4096 May 16 06:17 sitename/
drwxr-xr-x  2 root        root        4096 May 16 05:54 html/
755로 권한을 변경합니다.
$ sudo chmod 775 /var/www/sitename
생성한 폴더로 이동합니다.
cd /var/www/sitename
설치 프로세스를 시작합니다.
ghost install
다운로드 및 설치에 약간의 시간이 소요됩니다.
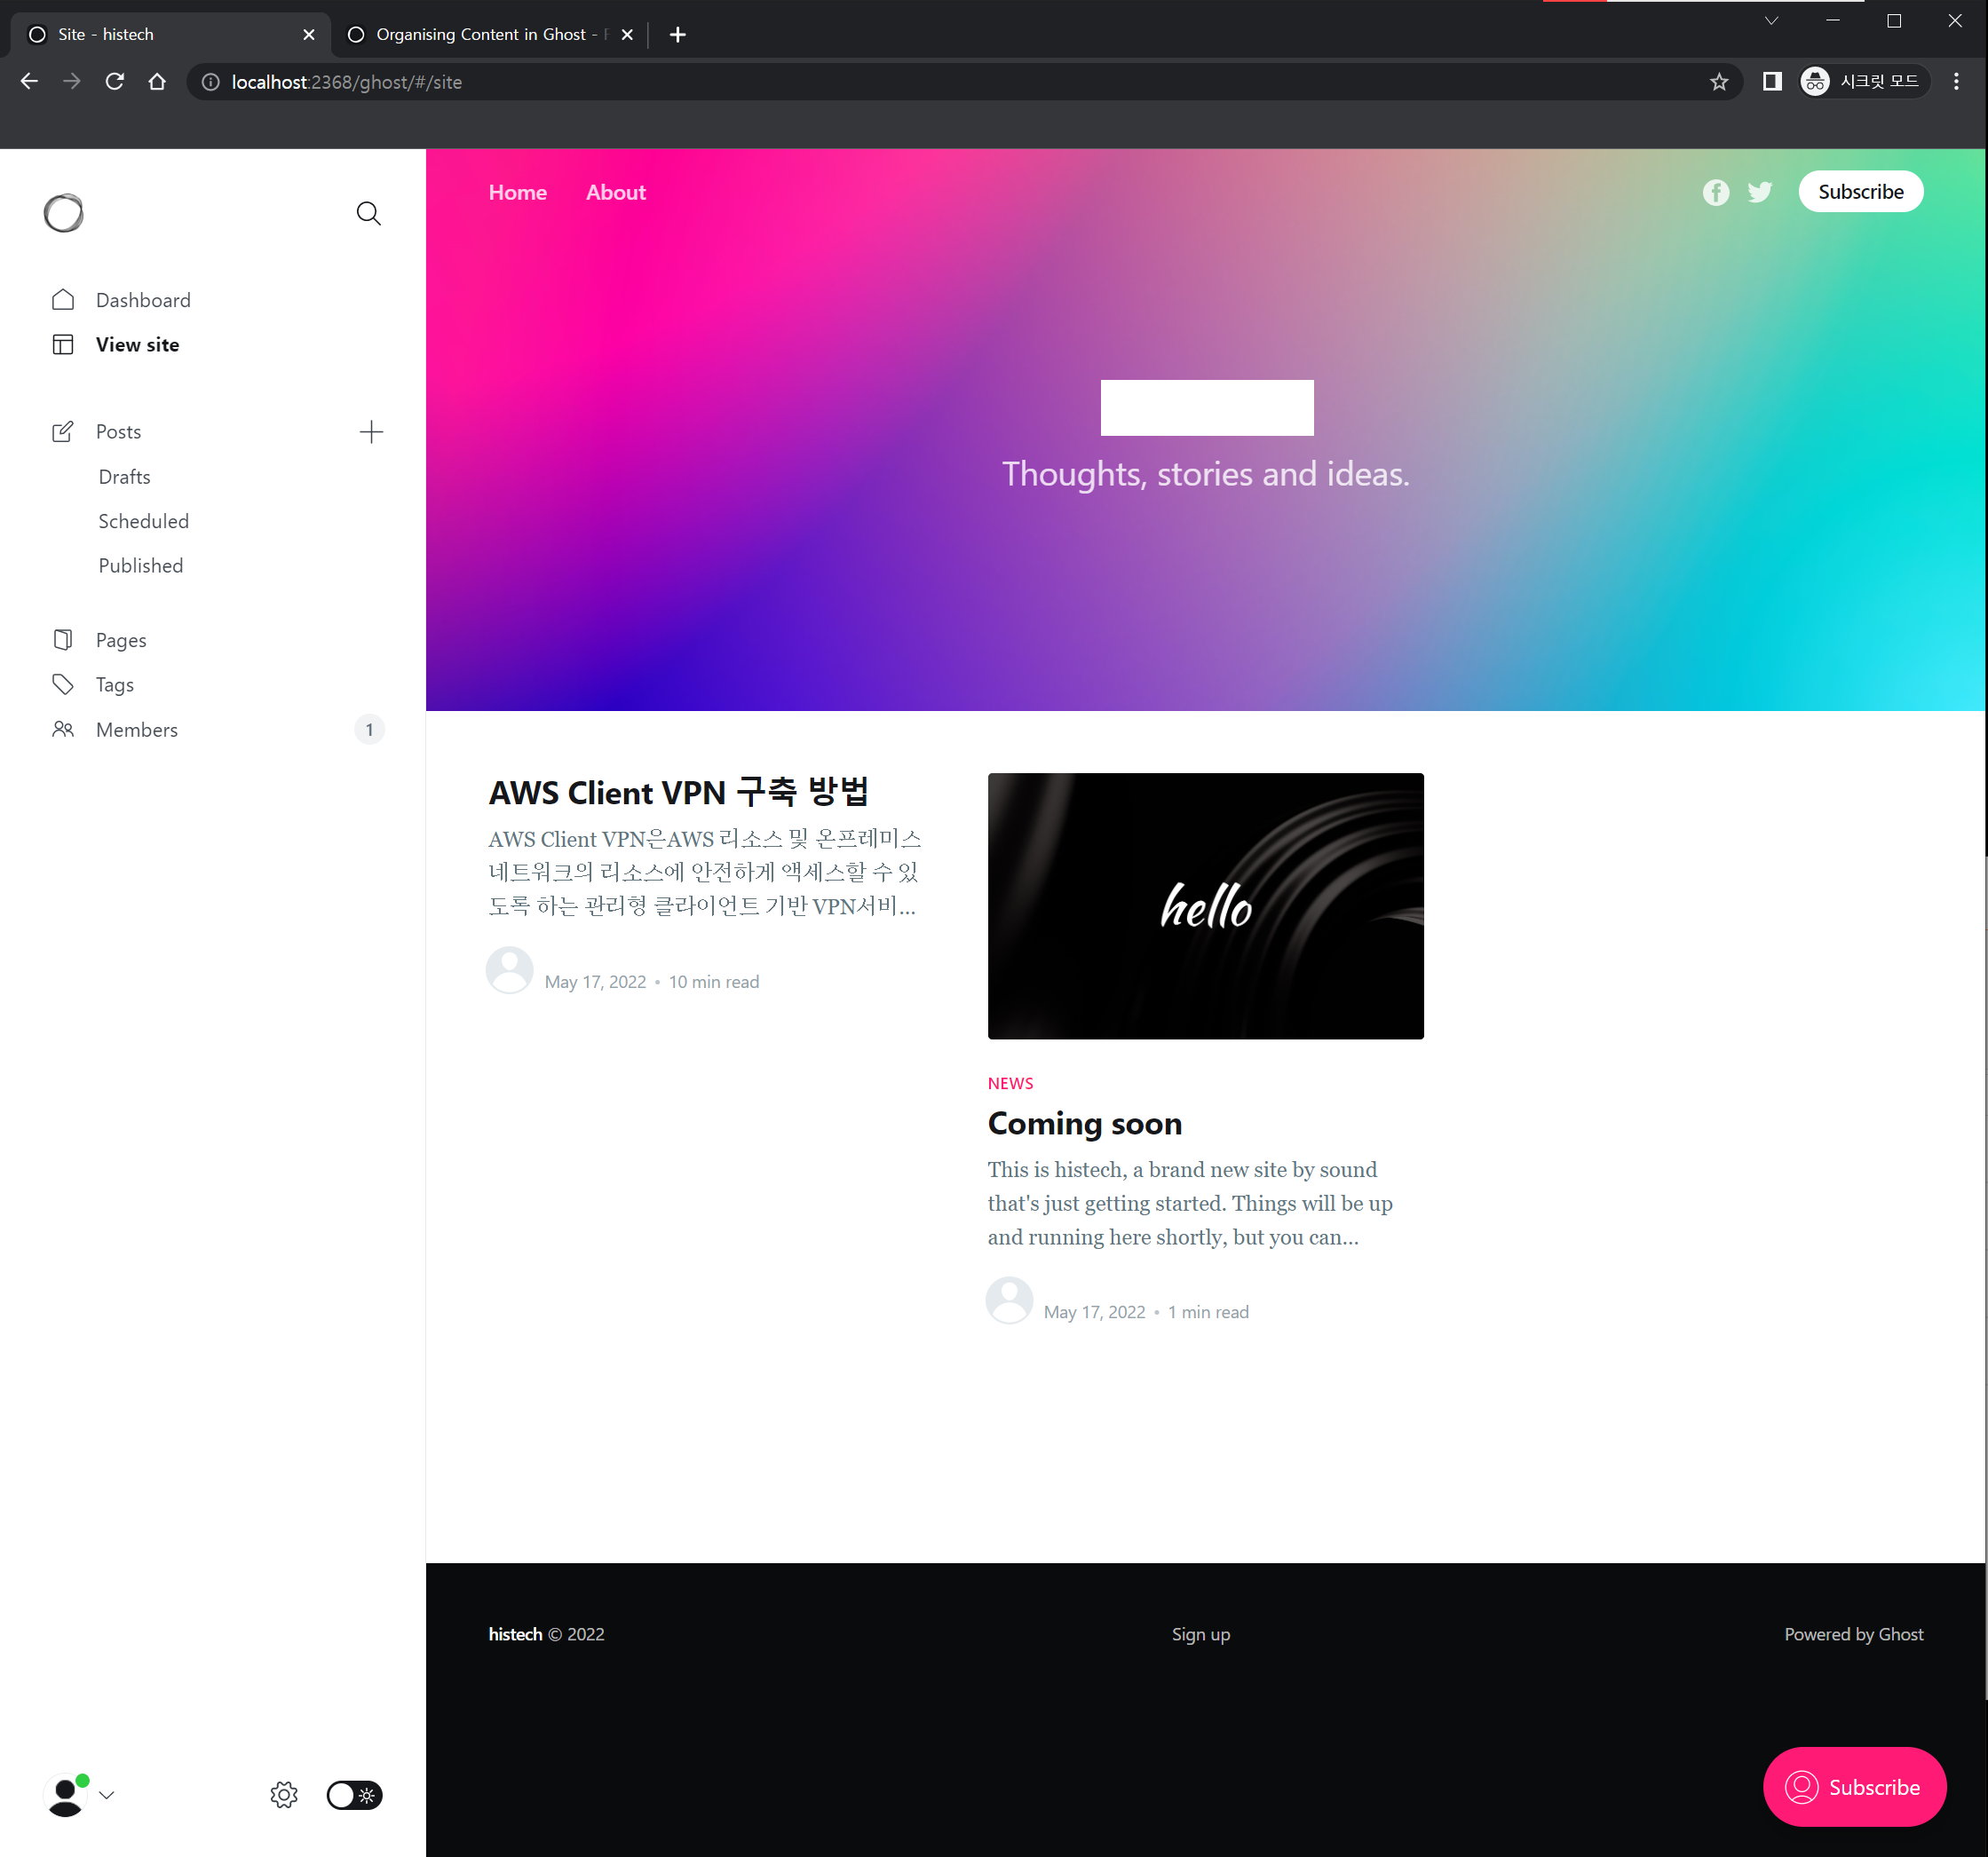
ghost 서비스가 올라오고 http://localhost:2368/ghost로 접속하니 잘 되네요.
AWS EC2에 만든 ubuntu서버에 docker 및 docker compose를 설치해보겠습니다.
먼저 생성한 ec2에 연결합니다.
> ssh -i "***.pem" ubuntu@ec2-***.ap-northeast-2.compute.amazonaws.com
The authenticity of host '***.ap-northeast-2.compute.amazonaws.com (xx.xxx.x.xxx)' can't be established.
ECDSA key fingerprint is SHA256:PcvcASLF420AQzOU5mzhCdy6D8OMMORUd29bpT6w0a8.
Are you sure you want to continue connecting (yes/no/[fingerprint])? yes
Warning: Permanently added 'ec2-***.ap-northeast-2.compute.amazonaws.com,xx.xxx.x.xxx' (ECDSA) to the list of known hosts.
Welcome to Ubuntu 22.04 LTS (GNU/Linux 5.15.0-1004-aws x86_64)

 * Documentation:  https://help.ubuntu.com
 * Management:     https://landscape.canonical.com
 * Support:        https://ubuntu.com/advantage

  System information as of Mon May 16 05:03:46 UTC 2022

  System load:  0.146484375       Processes:             105
  Usage of /:   5.0% of 28.90GB   Users logged in:       0
  Memory usage: 20%               IPv4 address for eth0: xxx.xx.xx.xxx
  Swap usage:   0%

0 updates can be applied immediately.


The list of available updates is more than a week old.
To check for new updates run: sudo apt update


The programs included with the Ubuntu system are free software;
the exact distribution terms for each program are described in the
individual files in /usr/share/doc/*/copyright.

Ubuntu comes with ABSOLUTELY NO WARRANTY, to the extent permitted by
applicable law.

To run a command as administrator (user "root"), use "sudo <command>".
See "man sudo_root" for details.

ubuntu@ip-:~$
ubuntu@ip-:~$ sudo apt-get install docker-ce docker-ce-cli containerd.io
Reading package lists... Done
Building dependency tree... Done
Reading state information... Done
The following additional packages will be installed:
  docker-ce-rootless-extras docker-scan-plugin libltdl7 libslirp0 pigz slirp4netns
Suggested packages:
  aufs-tools cgroupfs-mount | cgroup-lite
The following NEW packages will be installed:
  containerd.io docker-ce docker-ce-cli docker-ce-rootless-extras docker-scan-plugin libltdl7 libslirp0 pigz
  slirp4netns
0 upgraded, 9 newly installed, 0 to remove and 28 not upgraded.
Need to get 102 MB of archives.
After this operation, 422 MB of additional disk space will be used.
Do you want to continue? [Y/n] y
Get:1 http://ap-northeast-2.ec2.archive.ubuntu.com/ubuntu jammy/universe amd64 pigz amd64 2.6-1 [63.6 kB]
Get:2 http://ap-northeast-2.ec2.archive.ubuntu.com/ubuntu jammy/main amd64 libltdl7 amd64 2.4.6-15build2 [39.6 kB]
Get:3 http://ap-northeast-2.ec2.archive.ubuntu.com/ubuntu jammy/main amd64 libslirp0 amd64 4.6.1-1build1 [61.5 kB]
Get:4 http://ap-northeast-2.ec2.archive.ubuntu.com/ubuntu jammy/universe amd64 slirp4netns amd64 1.0.1-2 [28.2 kB]
Get:5 https://download.docker.com/linux/ubuntu jammy/stable amd64 containerd.io amd64 1.6.4-1 [28.1 MB]
Get:6 https://download.docker.com/linux/ubuntu jammy/stable amd64 docker-ce-cli amd64 5:20.10.16~3-0~ubuntu-jammy [40.6 MB]
Get:7 https://download.docker.com/linux/ubuntu jammy/stable amd64 docker-ce amd64 5:20.10.16~3-0~ubuntu-jammy [21.0 MB]
Get:8 https://download.docker.com/linux/ubuntu jammy/stable amd64 docker-ce-rootless-extras amd64 5:20.10.16~3-0~ubuntu-jammy [8167 kB]
Get:9 https://download.docker.com/linux/ubuntu jammy/stable amd64 docker-scan-plugin amd64 0.17.0~ubuntu-jammy [3521 kB]
Fetched 102 MB in 3s (32.3 MB/s)
Selecting previously unselected package pigz.
(Reading database ... 63599 files and directories currently installed.)
Preparing to unpack .../0-pigz_2.6-1_amd64.deb ...
Unpacking pigz (2.6-1) ...
Selecting previously unselected package containerd.io.
Preparing to unpack .../1-containerd.io_1.6.4-1_amd64.deb ...
Unpacking containerd.io (1.6.4-1) ...
Selecting previously unselected package docker-ce-cli.
Preparing to unpack .../2-docker-ce-cli_5%3a20.10.16~3-0~ubuntu-jammy_amd64.deb ...
Unpacking docker-ce-cli (5:20.10.16~3-0~ubuntu-jammy) ...
Selecting previously unselected package docker-ce.
Preparing to unpack .../3-docker-ce_5%3a20.10.16~3-0~ubuntu-jammy_amd64.deb ...
Unpacking docker-ce (5:20.10.16~3-0~ubuntu-jammy) ...
Selecting previously unselected package docker-ce-rootless-extras.
Preparing to unpack .../4-docker-ce-rootless-extras_5%3a20.10.16~3-0~ubuntu-jammy_amd64.deb ...
Unpacking docker-ce-rootless-extras (5:20.10.16~3-0~ubuntu-jammy) ...
Selecting previously unselected package docker-scan-plugin.
Preparing to unpack .../5-docker-scan-plugin_0.17.0~ubuntu-jammy_amd64.deb ...
Unpacking docker-scan-plugin (0.17.0~ubuntu-jammy) ...
Selecting previously unselected package libltdl7:amd64.
Preparing to unpack .../6-libltdl7_2.4.6-15build2_amd64.deb ...
Unpacking libltdl7:amd64 (2.4.6-15build2) ...
Selecting previously unselected package libslirp0:amd64.
Preparing to unpack .../7-libslirp0_4.6.1-1build1_amd64.deb ...
Unpacking libslirp0:amd64 (4.6.1-1build1) ...
Selecting previously unselected package slirp4netns.
Preparing to unpack .../8-slirp4netns_1.0.1-2_amd64.deb ...
Unpacking slirp4netns (1.0.1-2) ...
Setting up docker-scan-plugin (0.17.0~ubuntu-jammy) ...
Setting up containerd.io (1.6.4-1) ...
Created symlink /etc/systemd/system/multi-user.target.wants/containerd.service → /lib/systemd/system/containerd.service.
Setting up libltdl7:amd64 (2.4.6-15build2) ...
Setting up docker-ce-cli (5:20.10.16~3-0~ubuntu-jammy) ...
Setting up libslirp0:amd64 (4.6.1-1build1) ...
Setting up pigz (2.6-1) ...
Setting up docker-ce-rootless-extras (5:20.10.16~3-0~ubuntu-jammy) ...
Setting up slirp4netns (1.0.1-2) ...
Setting up docker-ce (5:20.10.16~3-0~ubuntu-jammy) ...
Created symlink /etc/systemd/system/multi-user.target.wants/docker.service → /lib/systemd/system/docker.service.
Created symlink /etc/systemd/system/sockets.target.wants/docker.socket → /lib/systemd/system/docker.socket.
Processing triggers for man-db (2.10.2-1) ...
Processing triggers for libc-bin (2.35-0ubuntu3) ...
Scanning processes...
Scanning linux images...

Running kernel seems to be up-to-date.

No services need to be restarted.

No containers need to be restarted.

No user sessions are running outdated binaries.

No VM guests are running outdated hypervisor (qemu) binaries on this host.
설치 완료 후 docker --version으로 버전을 확인합니다.
ubuntu@ip-:~$ docker --version
Docker version 20.10.16, build aa7e414
다음으로 docker compose를 설치합니다.
docker compose는 docker설치 시 함께 설치되지 않으므로 별도로 설치해주어야 하며, 여러 개의 도커 애플리케이션 컨테이너들을 정의하고 실행할 수 있도록 해줍니다. yaml파일을 사용하여 서비스를 설정하고 하나의 커맨드만으로 여러 개의 도커 컨테이너들을 사용할 수 있습니다.
ubuntu@ip-:~$ sudo curl -L "https://github.com/docker/compose/releases/download/1.29.2/docker-compose-$(uname -s)-$(uname -m)" -o /usr/local/bin/docker-compose
  % Total    % Received % Xferd  Average Speed   Time    Time     Time  Current
                                 Dload  Upload   Total   Spent    Left  Speed
  0     0    0     0    0     0      0      0 --:--:-- --:--:-- --:--:--     0
100 12.1M  100 12.1M    0     0  14.7M      0 --:--:-- --:--:-- --:--:-- 44.4M